FEATURED LEARNING GAME
Rory's Story Cubes |
|
With Rory's Story Cubes, anyone can become a great storyteller and there are no wrong answers. Simply roll the cubes and let the pictures spark your imagination.
more info... |
TRY THIS EASY CRAFT
Easter Bunny Treat Bag
|
PRINTABLE WORKSHEETS
Count, Circle, Color |
|
|
We've got everything you need for your child to practice writing the letter "A" including blank handwriting sheets.
more info... |
|
| |
Featured Family Activity - Helping Kids Have Fun With Gardening
Garden In A Bucket -
A Portable, Private Garden for Your Child
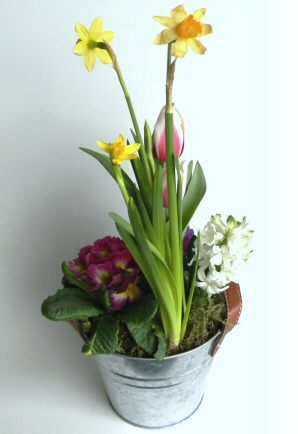
'Garden in a Bucket' lets kids create a personal, private garden that they can carry with them, take care of, show off and enjoy. Even the shortest attention spans can create a masterpiece and then these junior gardeners can enjoy their Garden in a Bucket all summer.
Difficulty: Easy
Time Required: 1 hour, not including shopping
What You Need
- A colorful plastic bucket or pail, at least 8" deep, preferably with a handle
- Plastic or lightweight trowel or scoop
- Lightweight potting mix
- Bright, low-growing bedding plants or dwarf vegetable seedlings
- Time release fertilizer
- Permanent markers
- Hammer & nails or drill or Styrofoam peanuts
Here's How:
- Have the kids pick out a colorful bucket or pail. Then head over to a plant nursery and let them choose a few small bedding annuals, like marigolds or zinnias, or a dwarf cherry tomato plant.
- Create drainage holes at the bottom of the bucket. An adult can poke a few holes with a nail and hammer or an electric drill. Three or four holes should be fine. If the bucket garden will be indoors and you’d prefer not to have drainage holes, fill the bottom of the bucket with 1-2 inches of Styrofoam peanuts to act as a reservoir, so the soil can still drain. This is a great use for those peanuts you can never get rid of.
- Let each child write their name on the front of the bucket with a permanent market, so everyone will know whose garden it is. Then have them decorate their buckets before planting, with markers, stickers and glued on trinkets and glitter.
- Have the kids fill their buckets about half way with the potting mix. Soilless mixes tend to be the lightest and will be easier for a child to carry in the bucket.
- Then give them a small handful of time release fertilizer pellets to sprinkle and mix into the soil.
- Help the kids carefully remove the plants from their containers and plant them inside their garden buckets. You can add more soil, if necessary.
- Water the Garden in a Bucket and that’s it! You can put the garden in a place of honor or take a drive to Grandma’s to show it off.
Maintain the Garden in a Bucket by keeping it watered, probably daily. Have your child check to see if it needs water by letting them poke their finger gently into the soil. If it feels dry about an inch below the surface, it’s time to water. Of course, if the plants start to wilt, that’s a signal to water too.
- To keep the Garden in a Bucket interesting, don’t forget to keep cutting the flowers to display in a vase or harvest and eat the tomatoes.
Tips:
- Don't worry about perfection. Once the plants start to grow, they'll straighten themselves out. Let the kids create.
- Have extra plants available. Little hands can be rough on tender plants.
- For small children, use edible plants andflowers like pansies, nasturiums and gem marigolds.
- Make Bucket Gardens at a birthday party. It's more fun in a group and the buckets make playful, inexpensive take-home gifts.
by Marie Iannotti |
|


